Just let we know what you want, and we will get in touch with you as soon as possible!
Mobile Bulk Material Handling Experts
Belt Conveyor Pulley Lagging Procedure
Lagging conveyor pulleys is an essential process to improve grip, reduce belt slippage, and protect the pulley surface from wear and corrosion. Properly applying lagging material, whether rubber, ceramic, or polyurethane, ensures efficient operation and extends the lifespan of both the pulley and the conveyor belt. This guide provides a detailed step-by-step procedure for lagging a conveyor pulley.

Types of Pulley Lagging Sheet
Before beginning, determine the appropriate lagging material based on operational requirements:
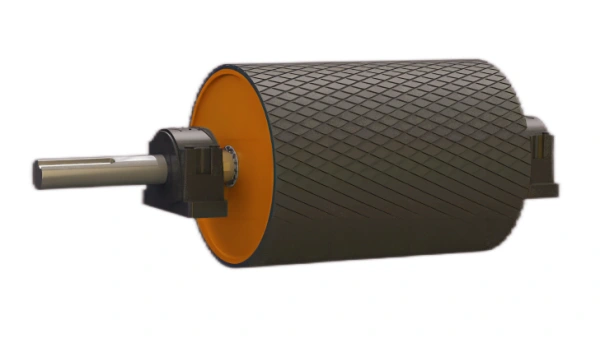
- Rubber Lagging Sheet: For general applications. Available in plain, diamond, and grooved patterns.
- Ceramic Lagging Sheet: For high-grip, heavy-duty, and abrasive applications.
- Polyurethane Lagging Sheet: For chemical resistance and lightweight applications.
Tools and Materials Required
Tools
- Wire brush or grinder.
- Cleaning solvent or degreaser.
- Measuring tape and chalk line.
- Adhesive applicator (for rubber or ceramic lagging).
- Clamps or belts for securing lagging.
- Roller or press (for smooth application).
Materials
- Pulley lagging sheets (rubber, ceramic, or polyurethane).
- High-quality adhesive (for rubber or ceramic lagging).
- Cleaning agent (e.g., acetone or alcohol).
- Sandpaper or abrasive tools.
Conveyor Pulley Lagging Procedure
Step 1: Prepare the Work Area
- Ensure the work area is clean and well-lit.
- Secure the pulley in a stable position to prevent movement during the procedure.
- Use appropriate personal protective equipment (PPE), such as gloves, goggles, and a dust mask.
Step 2: Surface Preparation
Proper surface preparation is crucial for ensuring the lagging material adheres securely to the pulley.
1. Clean the Pulley Surface:
- Remove any dirt, grease, or old lagging material using a degreaser or solvent.
- Wipe the surface dry with a clean cloth.
2. Sand or Abrade the Surface:
- Use a wire brush, grinder, or sandpaper to roughen the pulley surface.
- Create a rough texture for better adhesion of the lagging material.
3. Mark the Pulley:
- Use a chalk line or measuring tape to mark the alignment for lagging installation.
Step 3: Cut the Lagging Material
- Measure the pulley circumference and width.
- Cut the lagging sheet to size, leaving a small overlap (typically 2-3 inches) for a secure joint.
- For ceramic lagging, ensure the tiles align properly and fit within the pulley width.
Step 4: Apply Adhesive
1. Prepare the Adhesive:
- Mix the adhesive as per the manufacturer's instructions.
- Use the adhesive that matches the lagging material (rubber or ceramic-specific).
2. Apply Adhesive to the Pulley Surface:
- Spread a uniform layer of adhesive on the prepared pulley surface using a brush or applicator.
- Allow the adhesive to become tacky (typically 5-10 minutes, depending on the adhesive).
3. Apply Adhesive to the Lagging Material:
- Spread adhesive on the backside of the lagging sheet for double-sided bonding.
- Let the adhesive reach the same tacky state as on the pulley.
Step 5: Install the Lagging
1. Align the Lagging Material:
- Start from the marked alignment line and carefully place the lagging sheet on the pulley surface.
- Ensure the edges are straight and there are no gaps.
2. Press the Lagging Material:
- Use a roller or press to apply consistent pressure across the lagging sheet.
- Remove air bubbles and ensure full contact between the lagging and pulley surface.
3. Overlap and Secure Joints:
- For overlapping sections, ensure a tight fit by pressing firmly.
- Trim excess material if necessary.
Step 6: Secure the Lagging
- Use clamps, belts, or straps to hold the lagging in place while the adhesive cures.
- Follow the adhesive manufacturer's recommended curing time, which may range from 12 to 24 hours.
Step 7: Finishing Touches
- Trim Excess Lagging: Cut off any overhanging lagging material for a neat finish.
- Inspect the Lagging: Check for loose sections or bubbles. Ensure all joints are sealed properly.
Step 8: Reinstall the Pulley
- Reinstall the pulley onto the conveyor system.
- Align and tension the conveyor belt properly to ensure smooth operation.
- Perform a test run to verify the lagging's performance.
Maintenance and Inspection
- Regular Inspections: Check for wear, cracks, or detachment of the lagging during routine maintenance.
- Cleaning: Remove debris or buildup from the pulley and lagging to maintain grip and performance.
- Prompt Repairs: Repair or replace damaged lagging sections immediately to prevent further damage to the conveyor system.
Common Mistakes to Avoid
- Inadequate Surface Preparation: Poor cleaning or insufficient roughening can lead to lagging detachment.
- Incorrect Adhesive Application: Uneven adhesive layers may cause weak bonding or air pockets.
- Misalignment: Improper alignment of lagging sheets can result in belt tracking issues.
- Skipping Curing Time: Rushing the process without proper curing compromises the bond strength.
Properly lagging a conveyor pulley enhances the efficiency, safety, and durability of conveyor systems. By following this step-by-step procedure and using high-quality materials, you can ensure optimal performance and reduced downtime. Regular maintenance and inspections will further prolong the life of both the lagging and the conveyor system, ensuring smooth operations in demanding environments.

 English


